I created a program. exe that process and enhances artwork images in batches using AI: the input will be an excel with 3 columns: artwork name, artist name and artwork file name. Then the program enhances the low resolution image using prebuilt models to an 8k ready pdf that can be printed for different purposes, for example a gallery exposition.
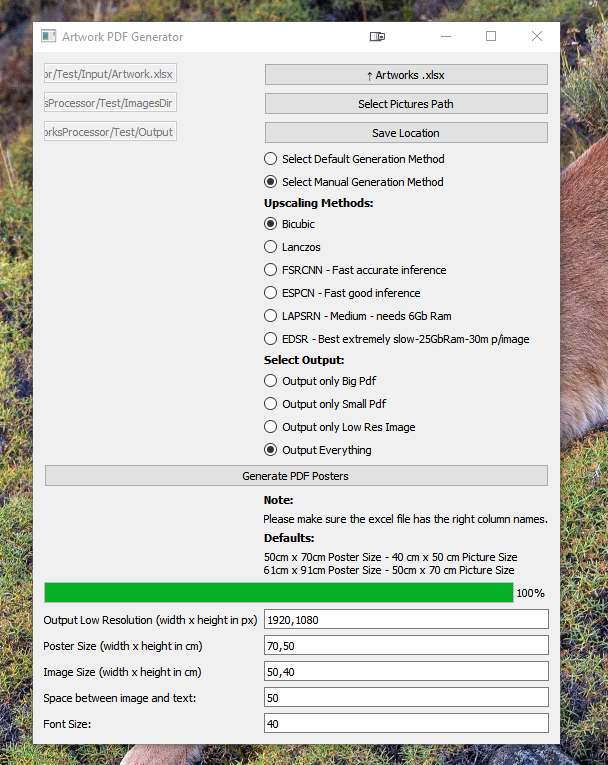
Figure. GUI I built using the PYQT5 picoFramework I developed for personal use. I will be sharing this picoFramework in the future if anyone finds it useful, youc an still do everything with PYQt5 but it might save some setup time if it’s your first time making a GUI with just pure code.
To accomplish the enhancements of the images I used the following resources:
*A model that outputs beautiful results in here, Mostly for faces: https://github.com/TencentARC/GFPGAN
*Another useful library is: mostly for backgrounds: https://github.com/xinntao/Real-ESRGAN
Demo Sites to see for yourself how this models might work:
https://app.baseten.co/apps/QPp4nPE/operator_views/RqgOnqV
https://arc.tencent.com/en/ai-demos/imgRestore
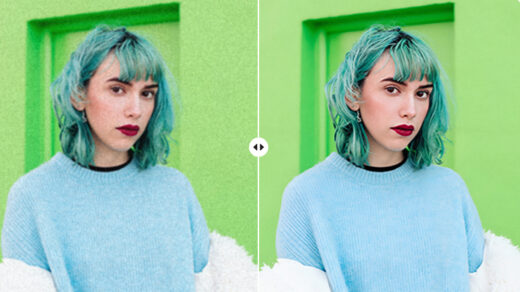
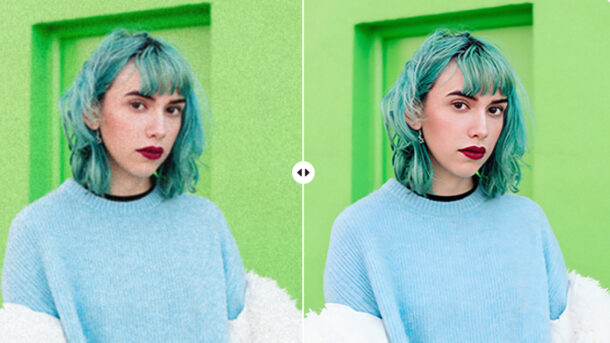
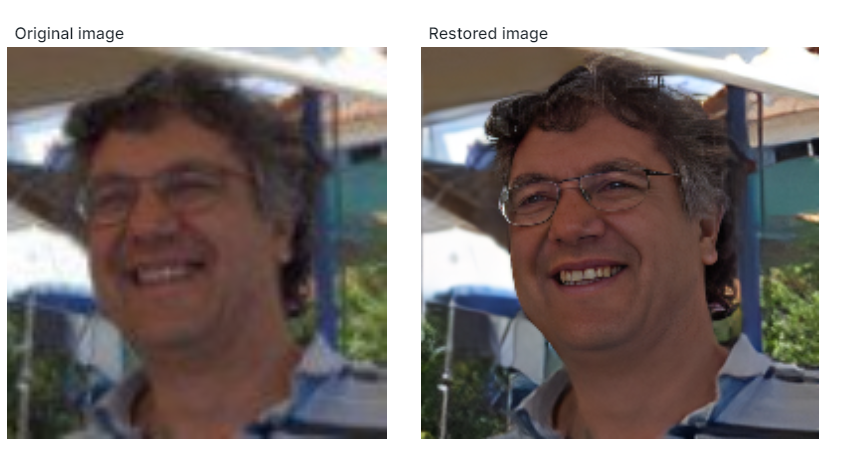
Examples of the AI scaling:
Example 1:
Before:

With Face upscaling:
Synthetic Upscaling:

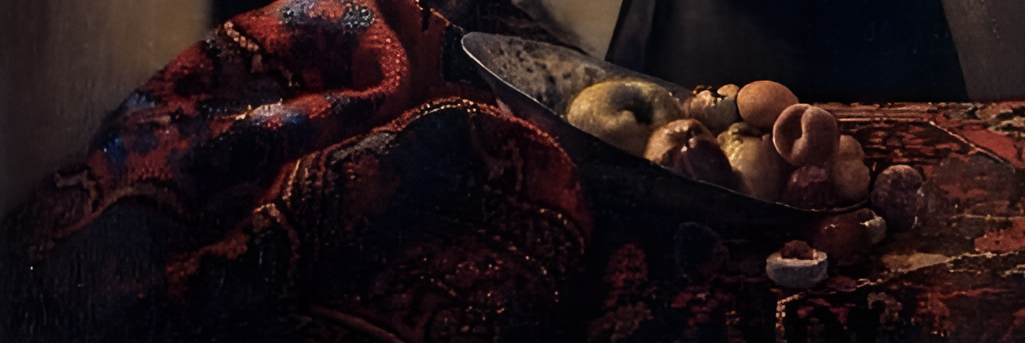
Example 2:
Before:

With Face Upscaling:

Synthetic Upscaling:

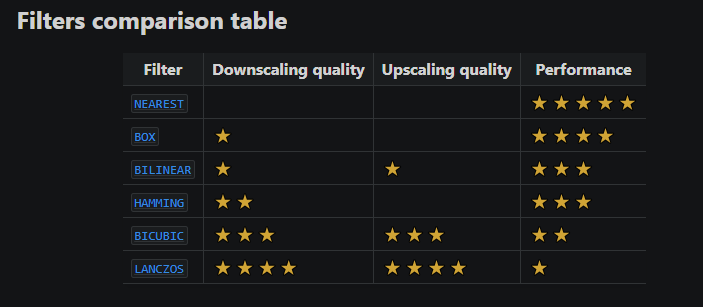
Common Upscaling methods Included
In the program I have included alot of different upscaling methods not only AI ones but others like the ones shown in the following table, this is so there’s more choice when processing the images.
Implementing the machine learning models in your python code!
In order to implement the machine learning models we can reference this sources:
Pyinstaller Problems and solutions found when developing the program:
When bundling with pyinstaller OpenCV was giving me issues I solved it by using python version 3.9.7 and OpenCV Version: 4.5.5.64.
I had to uninstall the current opeCV with: pip uninstall opencv-python
Then I used: pip3 install “opencv-python==4.4.4.64” —force-reinstall all this in a virtual environment.
If the correct version is not installed pyinstaller will refuse to bundle the program: I had to uninstall everything with the following commands because at first I had the default opencv version:
pip uninstall opencv-python
pip uninstall opencv-contrib-python
Then we can install the proper contrib version:
pip3 install "opencv-contrib-python==4.5.5.64" --force-reinstall
Model Research papers & Program Documentation/Usage
Important:
-If needed the font can be changed by replacing the “font.ttf” file(name must be font.ttf) -The Upsampling models included are EDSR, ESPCN, FSRCNN, LapSRN -At the moment only CPU can be used as GPU Support requires custom OpenCV Compilation. -The research papers on how this models work can be found in the following links:
https://arxiv.org/pdf/1707.02921.pdf
https://arxiv.org/pdf/1609.05158.pdf
https://arxiv.org/pdf/1608.00367.pdf
https://arxiv.org/pdf/1710.01992.pdf
-It is recommended for bulk processing to use ESPCN or FSRCNN as this are the less taxing models. -EDSR might crash computers with less than 32gb of ram. Processing times per iamge are greater than 30 minutes. -The bigger the source image the more time the models will take to process them. -For Really small or low res pictures LapSRN can be used without to many worries.
**WARNING, only use LapSRN with low res images, as the greater the image resolution the greater the resource intake. **WARNING, EDSR requires a computer with more than 32gb RAM, otherwise the system might crash or hang. Processing time per image is 30 minutes or longer.
Python Code Snippet to make AI enhancement work
Now the fun part this is how to use this models in your python program:
The models themselves are pretty lightweight we just need to place them inside our working folder or reference them.
We can define a function that handles the resize procedure:
import cv2

def process_machine(img,model_type,outpath_ML):

    # Read image and upscale it
    img = cv2.imread(img)
    sr = cv2.dnn_superres.DnnSuperResImpl_create()

    #If model_type is "EDSR" then
    if model_type == "EDSR":
        model = "EDSR_x4.pb"
        sr.readModel(model)
        sr.setModel("edsr",4)

    #If model_type is "ESPCN" then
    elif model_type == "ESPCN":
        model = "ESPCN_x3.pb"
        sr.readModel(model)
        sr.setModel("espcn",3)

    #If model_type is "FSRCNN" then
    elif model_type == "FSRCNN":
        model = "FSRCNN_x3.pb"
        sr.readModel(model)
        sr.setModel("fsrcnn",3)

    #If model_type is "LAPSRN" then
    elif model_type == "LAPSRN":
        model = "LapSRN_x8.pb"
        sr.readModel(model)
        sr.setModel("lapsrn",8)

    result = sr.upsample(img)
    cv2.imwrite(outpath_ML,result)

process_machine(image1_path,"ESPCN",outpath_risizer)
Is that easy!